Step1: Using StretchUp |
| |
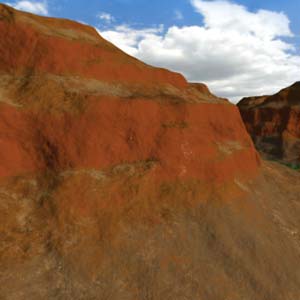
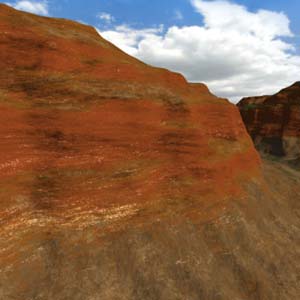
StretchUp, as the name suggests, controls how stretched each layer will appear in the Z (height) direction. This parameter affects primarily distribution and procedural bump of each layer. When the parameter is higher than 1.0, the layer will look more like a steep rock wall.
On the other hand, values between 0.0 and 1.0 will create good strata effects. Layers in canyon case use stretchUp to create a strata effect. Default StretchUp value of 1.0 will apply no stretching. To see the difference, go to material editor and apply material in slot 2: 'Canyon StretchUp None' to mesh 'Terrain'.
|
| |
 |
 |
| |
1. Default StretchUp 1.0 |
2. StretchUp less than 1.0 |
Step2: Using Map Limits to Create a Road |
| |
Map limits option is a great way for users to control placement of layers. It can be found under GW Layer distribution:
 |
| |
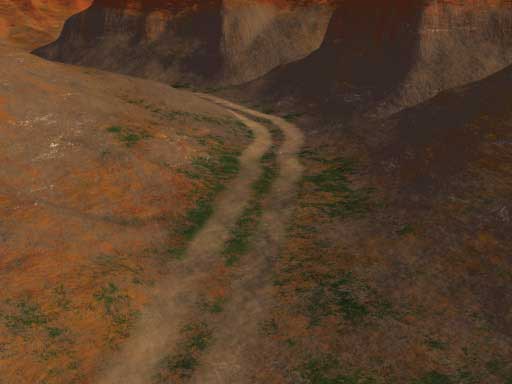
In this example, we will try to put a road in the valley.
First go to material editor and apply material in slot #3: 'Canyon Road' to mesh 'Terrain'. Go to the material's GroundWiz and select layer 'Road' in the GW Layer Tree.
Now go to Map Limits section for the current layer and click on 'Use' checkbox under Map Limits, and then the map button next to it. Pick Bitmap in the Map Browser list and then load image file 'roadMask.tga' from the same directory as the '.max' file.
Render the view from camera 'CameraOnRoad' and you should see the following image:
|
| |
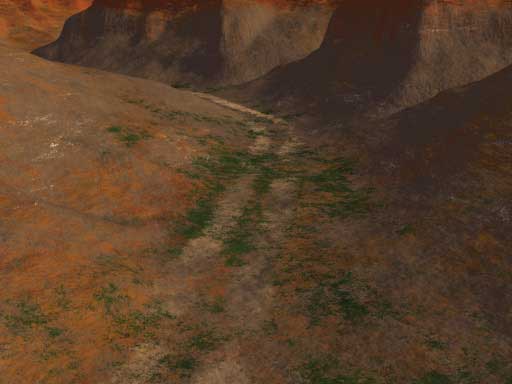
In the current example, Distribution Amount and Distribution Noise were intentionally set to extreme values to be able to see the road clearly. Change them to Amount 90% and Noise 20%. And the road blends in better:
|
Note: Map used in Map Limits can be any standard 3ds Max map (Bitmap and Vertex Color are especially useful).
It is important to know that white color represents zones where layer is visible while black color zones are invisible areas and shades of gray will be transition zones. And a good tip when using bitmaps as map limit
If you want transition zone to be bigger on your layer, either blur your image in some paint program or use Blur Offset in bitmap properties.
|
Step3: Final Improvement |
| |
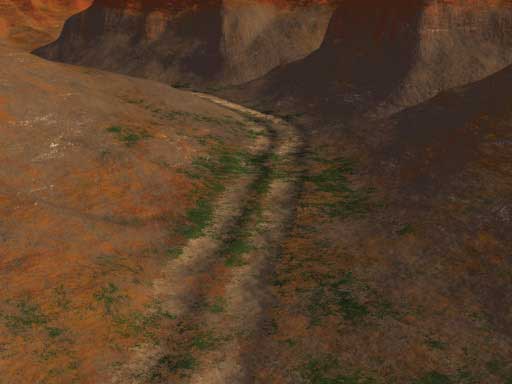
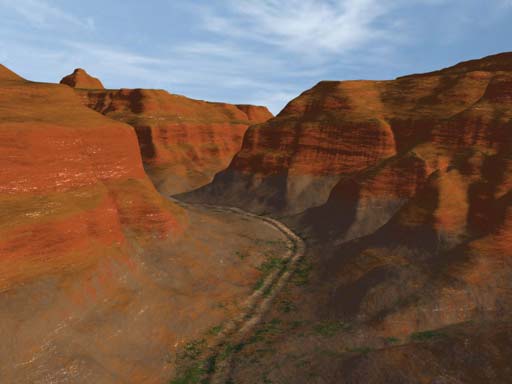
You can apply the same road map used in 'Map Limits' as Bump map to give extra depth to the road tracks.
Doing it and tweaking it is left as an exercise to the user but if patience is in short supply
go to material editor and apply material 'Canyon Road Final'. And the final renderings:
|
| |
|
Check other tutorials |