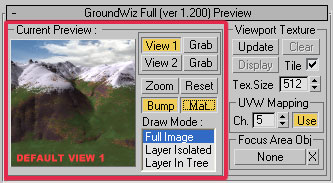
Current Preview - Allows users to quickly inspect layers and final look as the name suggests. Since rapid redraw is a primary concern, it has some limitations.
View1
View2 - Preview can store 2 views to be previewed. When user creates GroundWiz map, there will be 2 default view setups. To use your own preview, do the Grab. If button View1 (View2) is pressed-in, preview will be constantly updated. Disable updating by unpressing View1 (View2).Grab - Users should create their own previews by pressing Grab next to View1 (View2) button. Grab will capture snapshot of the currently selected 3ds Max viewport. It will take a couple of seconds for operation to finish*. Press 'Escape' key to abort operation. For preview grab to succeed, there must be at least one object in the view that uses current GroundWiz map on one of its materials. In preview, the object will be drawn as if it has Standard material applied and the Standard material uses GroundWiz in diffuseMap slot.
*Grab might take quite some time if scene, for example, is using advanced lighting like radiosity.Zoom - Pressing Zoom works the same as clicking on the small preview image. It will open a separate window where the preview is displayed in a bigger resolution. It is a standard 3ds Max bitmap window, so user can zoom with the middle mouse button, save image to a file and do all standard bitmap window operations.
Reset - Will destroy all user grabbed previews. Each user preview takes some space on disk (2.5MB or more if image maps are used on layers) when saved in max scene. Sometimes saving previews in max scene might not be desired if you're trying to reduce the size of a max scene file.
Bump - When checked, preview will be a bit slower but preview update will consider current bump settings. This might be needed since bump also affects slope of the surface. However, when detail is not important, 'Bump' can be disabled and with many layers preview will be quite faster.
Mat. - When checked, material slot in the material editor will be correctly updated. This, however, will also slow down preview update. Unchecking this option might be very useful when working with many layers.
Draw Mode - Preview can display:
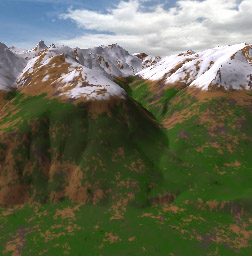
- Full Image: the whole layer tree is displayed. Each layer is displayed in its own color.
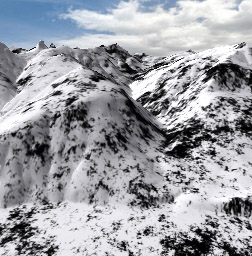
- Layer Isolated: only the currently selected layer is displayed in white color. The layer is only limited by its own distribution parameters. Parent layers and other layers covering the current layer are hidden.
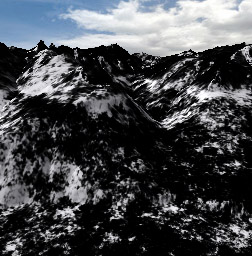
- Layer In Tree: the currently selected layer is displayed in white and all others are in black. It might come handy when you need to inspect visibility of the current layer in the final image.
Full Image
Layer Isolated
Layer In Tree
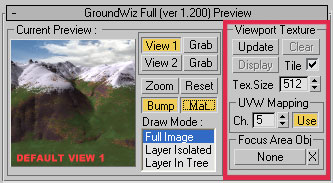
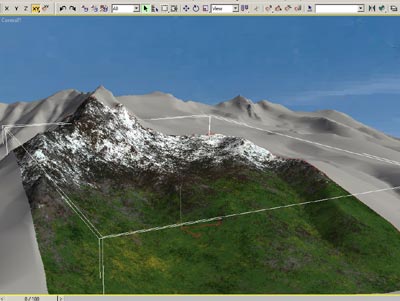
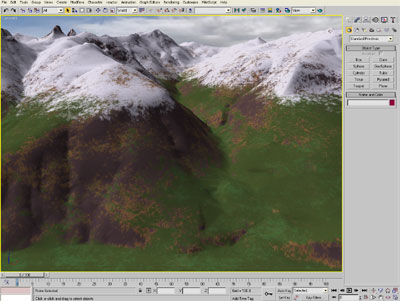
Viewport Texture Group - This feature is very useful when you want to show terrain texture in viewport. Updating the texture is a slow process so it is not meant as a previewing tool when adjusting terrain map. It should be used when you need to integrate your terrain with other parts of the scene. It will be helpful when you need to place buildings, plants and other objects around the terrain. To see the texture, don't forget to turn on 'Show Map in Viewport' in Material Editor.
Update - Updates/creates GroundWiz viewport texture.
Clear - Removes GroundWiz viewport texture. To remove viewport texture and save some memory and/or disk space, click 'Clear' button.
Display - Displays the current viewport texture in a separate window.
Tile - Turns on tiling. Just like UVW Mapping option, this is another 'hook' that was added to go around some problems that 3ds Max (VIZ) has when displaying objects in viewports. Unfortunately when tiling is disabled, lighting on the terrain will also disappear on many graphics cards. Disabling tiling is usually required when you are trying to display viewport texture on focused area and don't want to see texture repeated all over terrain. There will also be a red border displayed around the focused area to help you see edges of your textured area - this border can be disabled by modifying 'groundwiz.ini' configuration file.
Tex. Size - Sets the width & height of the viewport texture. You will have to press update after this value is adjusted. Since version 1.270, texture size limit 4096 was removed. However, big size might make 3dsmax / VIZ run out of memory so it should be used wisely.
UVW Mapping - This option was added to help improve the speed of real-time viewport preview. Unfortunately 3ds Max (VIZ) is not good at showing textured objects with big number of triangles in viewport if UVW mapping is not applied. To make it faster, you can let GroundWiz apply map to your object in a specified channel and with this option enabled, viewport preview might get much faster. You can later destroy the channel by removing UVW modifier from object's modifier stack.
(Note: The speed of viewport redraw of course depends mostly on user's hardware, but this option might help remove slow-downs when showing GroundWiz map in viewport - especially if terrain object has many vertices.)
Focus Area Obj - This option will allow you to see high resolution viewport texture for a small area of the terrain. It is useful if you are working with big terrains but need to pay attention to some small specific area (for example working on the surroundings of some house while the whole terrain is huge).
To use this feature, pick an object whose bounding box will be used to determine focus area. Once object is set, press 'Update' and the viewport texture for focused area will be created. Resolution for some small area will be a lot better than when creating texture for the whole terrain.
Creating Focused Area in steps
Focused area texture was created based on object's bounding box
X - Disables focused area mode. Next time you press 'Update', viewport texture will be recreated for the whole terrain.
Preview limitations - Since final rendering can take quite some time, preview takes some shortcuts in displaying objects:
- No anti-aliasing
- Lighting is fixed. It will not change until user does another Grab.
- Bump doesn't affect lighting, but bump will affect surface slope and therefore can affect layer distribution.
- Color map, bump map and distribution limit map, all will be captured when view is grabbed. Any change to maps will not affect the preview until user does another Grab.
- Layer Extended Channels do not affect preview.
